
- Log in to the portal
Go to login.flowscape.se/wm and sign in with your admin account.
In the left sidebar, navigate to Files › and open Email Templates
3. Download an existing template
Click on the template that you want to base your new template on. A panel opens on the right — scroll to the bottom, find the HTML file, and click Download.
4. Create a new template
Close the right-hand panel and click + Create in the top-right corner of the page.
5. Upload the file and save
Click Select file and choose the HTML file you downloaded in step 3. Check the Active checkbox, then click Save.
6. Open the template for editing
The new template is now saved, but the content still needs to be edited. Click on the template you just created to open it, then click "Edit".
7. Edit the text and save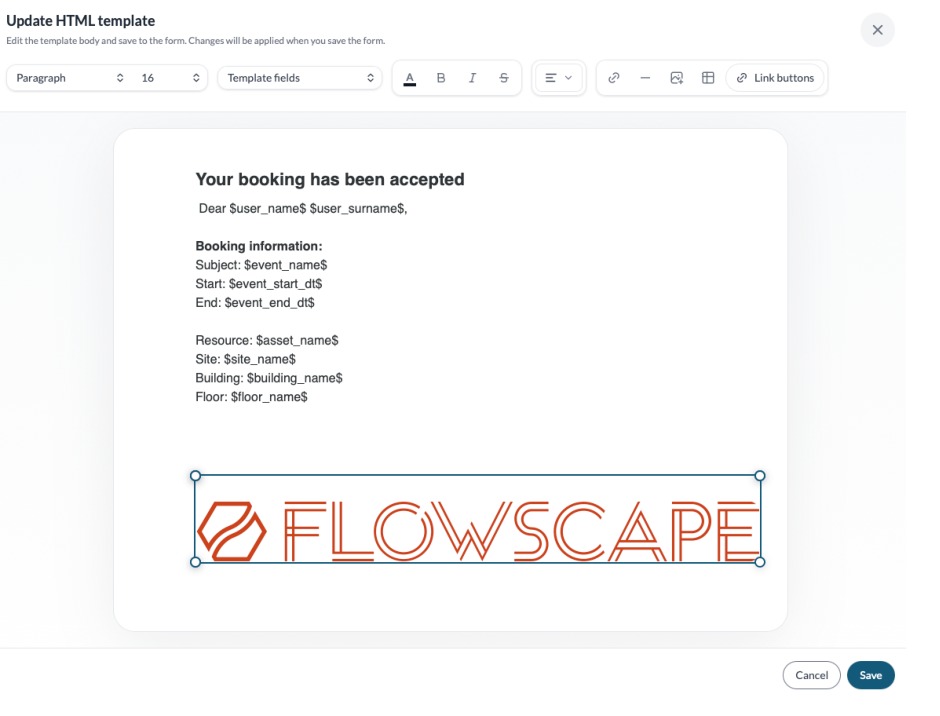
Update the text content as needed, then click Save. When prompted, click Save again to confirm.
Important:Only edit lines that contain plain text. Do not modify any words starting with $(dollar sign) — these are system variables and will break the template if changed.
8. Assign the template in Asset Configurations
Your new template is ready to use. Go to Asset Configurations ›Notifications, select the relevant email type (e.g. Check-in email template), and choose your new template from the dropdown.
The system will now use your custom template for the selected mailing. Repeat these steps to create templates for other functions.
Comments
0 comments
Please sign in to leave a comment.